Your First In-Game UI
Import an HTML page into an Unreal Engine project and display a static information panel in the game using MarkupUIWidget.
Before You Begin
Enable the plugin as described in Installation and Project Setup and prepare the first-page/ example from Write Your First Page. The example contains pages/index.html and styles/main.css and runs without a data context.
Configure Directories and Import the Page
- In Unreal Editor, open Edit → Project Settings and find the Markup UI plugin settings.
-
Configure the two directories.
- Design Root Directory is the Design-Time Directory. Select the example's
first-page/directory. - Asset Root Directory is the Asset Directory. Set it to
/Game/FirstPageUI, which corresponds toContent/FirstPageUI/in the project.
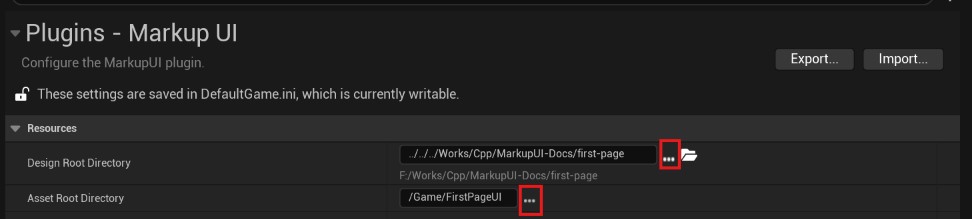
- Design Root Directory is the Design-Time Directory. Select the example's
-
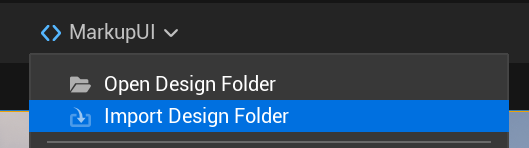
At the top of the Viewport, choose Markup UI → Import Design Folder to synchronize the example files into the project.
- In the Content Browser, open
/Game/FirstPageUI/pages/and double-click the importedindexHTML document asset. Confirm that the preview shows the title and theReadystatus area.
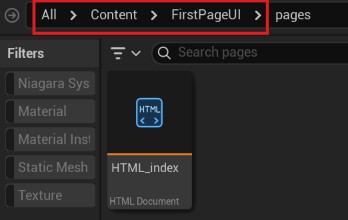
Synchronization preserves the relative locations of pages/ and styles/ so that ../styles/main.css resolves to the stylesheet asset.
Import Design Files
You can also drag individual HTML and CSS files into the Content Browser.
Keep design files together in the Design-Time Directory to synchronize them to the Asset Directory with Markup UI → Import Design Folder.
Create a Widget Blueprint
- In the Content Browser, create a Widget Blueprint with
User Widgetas the parent class and name itWBP_FirstPage. - Open
WBP_FirstPage. In the Designer, find Canvas Panel in the Palette and add it as the root container. - Search for MarkupUI Widget in the Palette and drag it into the Canvas Panel.
- Select the widget and assign the imported
indexHTML document asset under Details → MarkupUI → Document. - Set the widget's anchors to fill its parent and set all four offsets to
0. - Click Compile and Save.
Editor Preview
Use the HTML document asset editor to inspect the static page. The Widget Blueprint Designer can display the page differently from the game. Verify the final result at runtime.
Display the Page in a Level
In your test level, follow these steps.
- Open Blueprints → Open Level Blueprint.
- Add a Create Widget node after Event BeginPlay and set Class to
WBP_FirstPage. - Connect the Create Widget return value to Add to Viewport, then connect the execution pins.
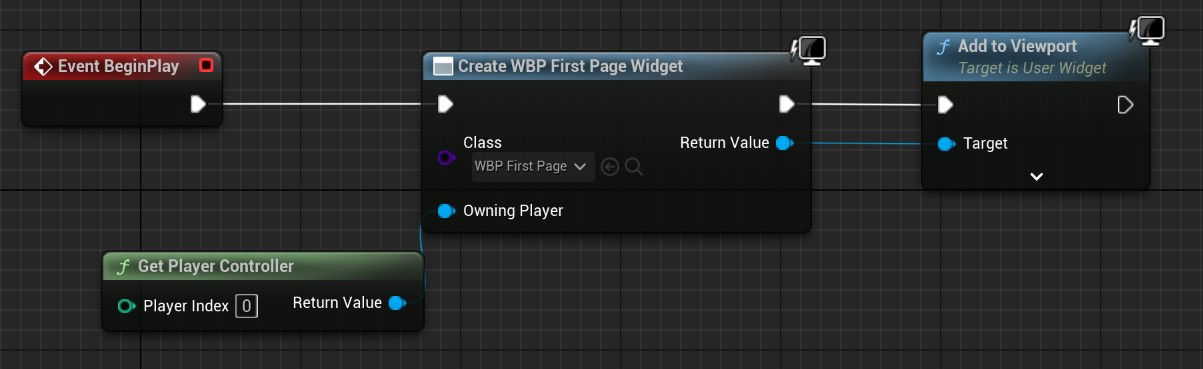
- Compile and save the Level Blueprint, return to the editor, and click Play.
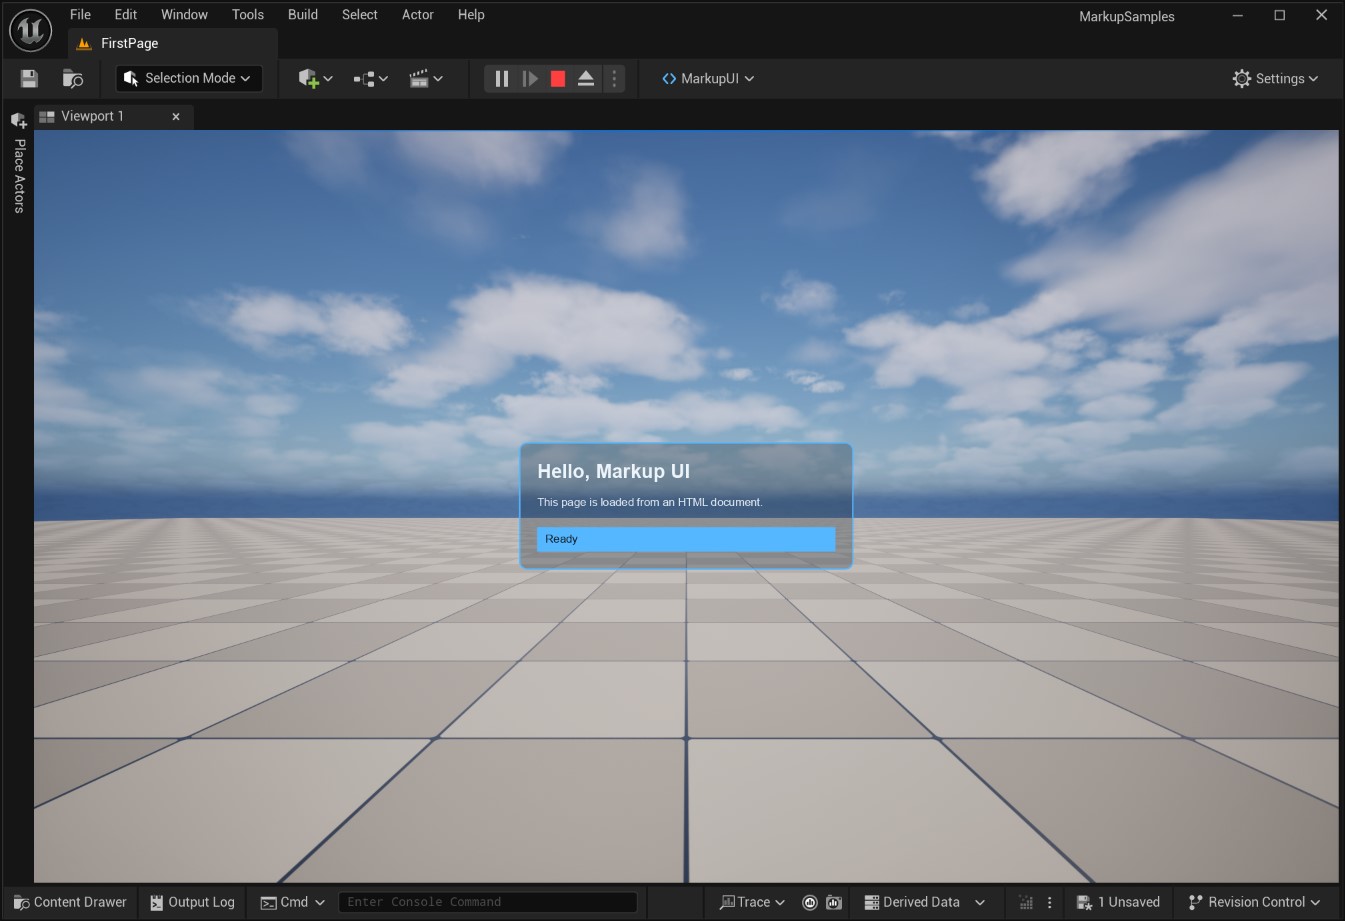
The game should display a dark panel with the title Hello, Markup UI and a Ready status area. Ready is static text defined in the page.
Edit the Page
- Edit and save
pages/index.htmlorstyles/main.cssin theDesign-Time Directory. - Stop playback and synchronize the assets again with Markup UI → Import Design Folder.
- Click Play again to check the updated UI.
Troubleshoot Display Issues
| Symptom | What to check |
|---|---|
| The UI is missing | Check that WBP_FirstPage was created and added to the Viewport, and that it has enough space to display. |
| The widget appears but the page is blank | Check that Document points to the imported HTML document asset. |
| Text appears without styles | Check that the CSS was synchronized and that pages/ and styles/ retain their relative positions. |
| The UI still shows the previous content | Save the source files, synchronize the assets again, and restart playback. |
See Data Binding Overview to connect game data to a page.